I made these using STASH fabrics. Can't believe I had the perfect stuff for the covers and never got around to doing it. PR Stash contest saves the day!
This first comforter cover is for a Cal-King size bed and measures 88"x102".
And this one is for a twin size bed and measures 88" x 65"
Here's a quick tutorial on how to make a basic duvet cover (comforter cover).
First, take measurements of a cover you have. Usually, you'll find that it's a few inches bigger than the comforter... sometimes up to 4" larger. This allows for the "fluff" factor. So if you don't have a cover but want to make one, take measurements and add a few inches.
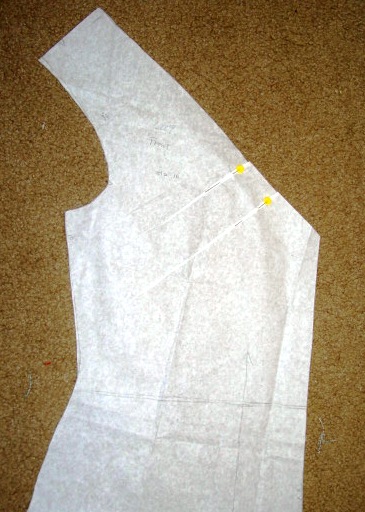
My covers have pieced tops. It's not hard to do, just takes a little bit of math to add seam allowances where you piece.
It's easiest to place your button band along the bottom of the cover. To do this, add an extra 2" to the bottom edge. Then cut a facing piece about 2" wide by the length of the bottom edge. I cut mine using the red fabric since I was nearly out of the taupe linen. Make sure you interface the button band. Finish the facing edge. Apply the facing to the bottom of the cover. Turn, press and topstitch. Here is a view of the top and underside of the button band for the comforter cover top piece.
Make the buttonholes. Here you can see what it looks like on the top and inside view.
The top of your cover is ready. Now, I used a flat sheet to make the underside of the cover. It's smooth, easy and it was already in my stash. But... it doesn't quite match my comforter cover. That's okay. It doesn't bother me, and I'm saving the last of my fabric for the matchng pillow cover. However, if you have a spare flat sheet that you'd like to use, but still have a some leftover fabric from the cover top, you could sew a border around your bottom piece using the face fabric. I didn't. Sadly, I've now just about run out of that wonderful taupe linen.
Anyway, to prepare the bottom section, measure the finished top piece and cut the same size piece, adding 2" for the button band. At this point, if you want to add the border to the bottom piece, you could sew your extra fabric around the edges. Cut 6" strips, fold 1/4" along one edge and topstitch it to the bottom piece, matching the cut edges. You can simply overlap the corners, or get fancy and miter them. Finish along the button edge, fold over 1 1/2" apply a strip of interfacing and stitch along the edges. When that's done, place the top and bottom pieces right sides together and just sew around along three edges, leaving the bottom open. Finish the edges, Give it a good pressing, sew the buttons on... and it's ready!
Kinda like sewing a giant bag... not so bad eh?
TIP: If you have some card tables, place one behind your sewing machine, and one next to you. It'll help support the huge amount of fabric you'll be working with. Oh.. and it's best if the tables are either the same height or slightly lower than your sewing area.
Go to it! It's such a rewarding project. And heck, your bed won't mind if your stitching is slightly off or the fit is not perfect...Beds are forgiving like that... :D