As promised, here are the mitered corner napkins I made using some leftover cotton fabric. These are my favorites and for our family, I think the smaller size works best. We use them to wrap breakfast to eat on the road, and they are small enough for children to manage at regular mealtimes. The bigger ones seem to end up knocking over milk cups... which kinda defeats the purpose of using napkins... mess prevention.
On the larger, dinner sized napkin, the central square measured 18" and the border is 2" wide. It took about 1/3 yard 45" fabric in order to make this border, 2 strips, each cut 5" wide.
The smaller napkins are cut 10 1/2" with a 1 3/4" border. I chose this size because I could get 4 napkins out of 1/3 yard of 44" fabric. And I'm not sure how much yardage I used for the borders, but it took about 1 1/4 strips to make one small napkin.
Here's how I cut my small napkins:
Cut your central square whatever size you'd like. In this case 10 1/2". 1" of this will be your seam allowances. (1/2" each side)
Cut your strips adding 4 times the length + twice the finished border width for each corner. The width of the strip should be twice the depth of the border + 1". For mine, it's 4 1/2"... 1 3/4" + 1 3/4" + 1" = 4 1/2"
Sew the strips together and press open your seam., then press the edges up 1/2" on both sides, and fold in half, matching edges and press flat.
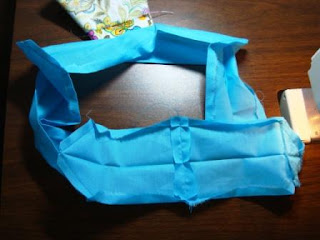
Now, make the corners. It's a bit hard to explain this, but you open your border and use the fold lines to construct your miters. To make those miters, fold your border piece right sides together, matching the folds.
Then measure the width of your finished border (1 3/4" here) along the top and bottom fold lines. Mark. Connect these marks to the center fold, forming a "V"... this forms the mitered corner when you're finished. Sew from one mark, up to the tip of the V, then down to the bottom mark.
The measurement from corner to corner at the beginning of each V is 9 1/2"(see picture above).
Here's a close up. The measurement from the vertical folded edge on the left side to the little mark where the start of the V is measures 1 3/4". This is where you start sewing. Don't sew into the seam allowances.
Trim the corners and close off the border. From V to V on my napkin, it measure 9 1/2".
Turn and press, making sure the folded edges match. Now you've got a nice frame to work with.
Pin the center piece in, sandwiching it between the border edges.
Sew it in.
The nicest detail here is the stitching used to sew the border on. I used one of the decorative stitches on my machine and it came out looking very nice. It also assured that the border on the opposite side would be caught in the sewing, even if I was slightly off.
And that's all folks! Oh... if you want the napkins to look good on both sides, simply double your center fabric and place them wrong sides together. Nice! These would make a great hostess gift for the holidays... Gonna have to dig through my stash and see if I have some nice holiday prints!


