Showing posts with label Handmade gifts. Show all posts

Wednesday, September 8, 2010

Mitered Corner napkins

As promised, here are the mitered corner napkins I made using some leftover cotton fabric. These are my favorites and for our family, I think the smaller size works best.  We use them to wrap breakfast to eat on the road, and they are small enough for children to manage at regular mealtimes.  The bigger ones seem to end up knocking over milk cups... which kinda defeats the purpose of using napkins... mess prevention.

On the larger, dinner sized napkin, the central square measured 18" and the border is 2" wide.  It took about 1/3 yard 45" fabric in order to make this border, 2 strips, each cut 5" wide.
The smaller napkins are cut 10 1/2" with a 1 3/4" border.  I chose this size because I could get 4 napkins out of  1/3 yard of 44" fabric.  And I'm not sure how much yardage I used for the borders, but it took about 1 1/4 strips to make one small napkin.

Here's how I cut my small napkins:

Cut your central square whatever size you'd like.  In this case 10 1/2".  1" of this will be your seam allowances. (1/2" each side)

Cut your strips adding 4 times the length + twice the finished border width for each corner.  The width of the strip should be twice the depth of the border + 1".  For mine, it's 4 1/2"... 1 3/4" + 1 3/4" + 1" = 4 1/2"


Sew the strips together and press open your seam., then press the edges up 1/2" on both sides, and fold in half, matching edges and press flat.

Now, make the corners.  It's a bit hard to explain this, but you open your border and use the fold lines to construct your miters.  To make those miters, fold your border piece right sides together, matching the folds.
Then measure the width of your finished border  (1 3/4" here) along the top and bottom fold lines.  Mark.  Connect these marks to the center fold, forming a "V"... this forms the mitered corner when you're finished. Sew from one mark, up to the tip of the V, then down to the bottom mark. 

The measurement from corner to corner at the beginning of each V is 9 1/2"(see picture above).

Here's a close up.  The measurement from the vertical folded edge on the left side to the little mark where the start of the V is measures 1 3/4".  This is where you start sewing.  Don't sew into the seam allowances.

Trim the corners and close off the border.  From V to V on my napkin, it measure 9 1/2".

 Turn and press, making sure the folded edges match.  Now you've got a nice frame to work with.

Pin the center piece in, sandwiching it between the border edges.


 Sew it in.

The nicest detail here is the stitching used to sew the border on.  I used one of the decorative stitches on my machine and it came out looking very nice.  It also assured that the border on the opposite side would be caught in the sewing, even if I was slightly off.

And that's all folks!   Oh...  if you want the napkins to look good on both sides, simply double your center fabric and place them wrong sides together.  Nice!   These would make a great hostess gift for the holidays...  Gonna have to dig through my stash and see if I have some nice holiday prints! 

Wednesday, August 11, 2010

Binder Cover Tutorial - Part 4: More Construction

Okay.. today we'll finish it up!  


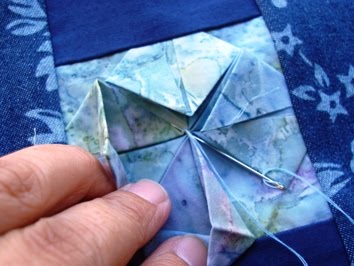
First, let's tack down that origami flower.  Add a button or bead in the center if you'd like, but tack the middle. You can also tack the petals open if you'd like, but I usually save that for last.   


Let's get the back/sleeves ready.  To prepare the sleeves,  machine hem the straight edge by folding over 1/4" and pressing.  Then fold over 1" and press again.  Sew along that edge and your sleeves are ready to attach to the back piece.  Here's what they should look like.


Now, sew the sleeves onto the back piece. Place the wrong side of the sleeve onto the right side of the back fabric piece.  Sew all the way around using a 1/2" seam allowance.  Don't worry, it'll turn out correctly....


Now, place the front piece (the one with the interfacing) and the back piece (the one with the sleeves) right sides together and pin, matching the raw edges.  Make sure you are tracing just slightly outside the edges of the binder.  This will allow the necessary ease to slip the binder into the cover.  Don't sew yet.... one more step.


Slide the binder to the side just a little bit, a scant 1/4" will do. Trace.  This is the amount of ease you'll need in order to close the binder.  When you slide it back, it should look like this.  Now you're ready to sew.


Sew along your traced line, leaving an opening for turning the cover right side out.  Trim to 1/4" all the way around, clip your corners and give it a good pressing.


I like to press up the opening before turning.  This makes it easier to hand-stitch the opening shut when we're done.  Just fold it up along the traced line and press.


We're almost done.  Turn and press....


Slip stitch the opening shut....


Tack down the petals.... and it's done!  Ready for a new school year!


Tuesday, August 10, 2010

Binder Cover Tutorial - Part 3: Construction


We're ready to put the pieces together!  First, lets separate the outer pieces from the backing pieces.

I like to place them "mapped."  In other words, they're placed in position.  Here's the front pieces:


And here are the backing pieces:

Lets start putting together the front pieces.  Remember, all seam allowances on the decorative strip are 1/4".  We'll start by constructing the pencil pocket.  Hem the top edge by folding over 1/4" and press, then fold over 3/4" more and press, then sew.
Next, fold it down the center, lengthwise, and draw a stitching line.  Then make gathering stitches on the bottom edge of the pocket.  To make the gathering stitches, set your stitch length to 5.0 and sew just inside the 5/8" seam allowance.  Sew another row of stitches about 1/4" along that row.

Place the pocket piece on the bottom strip (back of the pocket), matching the bottom edge and sew using a regular straight stitch.  Then sew the sides of the pocket piece, matching the edges.  Gather the bottom to fit and sew across the gathered edge.  Your pocket piece is ready to sew into the decorative strip.

Assemble the origami flower/pocket strip pieces using 1/4" seam allowances.


Next, sew the front and back panel pieces to the strip using 1/4" seam allowances.  Press.  Here's the completed front piece.  


Apply the interfacing to the back of the front piece.


We're ready for Part 4:  More Construction

Tuesday, July 6, 2010

Binder Cover Tutorial - Part 1: Making the master pattern


Here's what we're working on today.  Our binder cover has an origami fabric flower and two pencil (or tracing wheel) pockets.   It's a perfect way to start off a new school year!  Let's start by making a pattern.

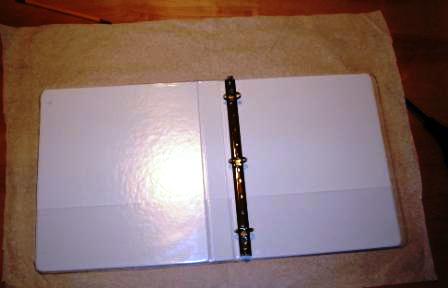
1)  Making the master pattern is very simple.  First, trace around your open binder, adding about 1/4" extra along one short side so your binder will close.  Try it...you'll find that you need that extra 1/4" for *ease.  My binder measures 11 1/2" x  22" when it's open.  The spine is about 1 1/2" wide.  After tracing and adding ease, my pattern piece ended up being 22 1/2" x 11 3/4."  This is BEFORE adding seam allowances. 

2)  Next, draw in the elements you want to include in your design.  I wanted to have an origami flower and a two pencil pocket.  Here's a close up of the elements.  It's a little hard to see, but if you compare it with the finished cover, you can see the separate elements.

3)  Use the master pattern to trace off the pattern pieces, adding seam allowances.  I used a tracing wheel and tracing paper to transfer it to oaktag.   Then  I added 5/8" seam allowances around the perimeter, and 1/4 seam allowances on the inside seams (the section with the decorative strip).  Don't forget that the top strip piece, bottom strip and pocket pieces all fall on the perimeter too and will need 5/8" seam allowances on one edge.  The origami flower requires a square that is twice as big as the pattern piece.  Here's a better view of my  decorative pieces:

I used oaktag to make my pattern pieces as I intend to use this pattern often.  In this picture, the pieces are as follows, cut 1 each unless otherwise stated.


Top row:  Binder Cover Sleeve (Cut 2)- add 1" along the straight side for hems,  Origami Flower (7"square), Pencil Pocket - add 1" along the top edge for hem., 1/4" seam allowance on sides and top edges, 5/8" seam allowance on bottom edge, and make sure it's 1/2" wider than the strip pieces.  Prepare the Pencil Pocket by folding in half lengthwise and drawing a line in the crease.  This will be the sewing line when you apply it to the Bottom Strip piece.
Middle row:  Binder Cover Back (5/8" seam allowance around perimeter, 1/4" seam allowance on straight edge), Top Strip (5/8" seam allowance along the top edge, 1/4" seam allowance on all other edges), Bottom Strip (5/8" seam allowance on bottom edge, 1/4" seam allowance on all other edges), and Front Cover Piece (5/8" seam allowance around perimeter edges, 1/4" seam allowance on straight side).
Bottom row:  Backing piece. Cut 1 fabric, cut 1 interfacing both with 5/8" seam allowance.

*ease = The extra room calculated into the pattern provided for movement... in this case, to close the binder.

Draw in grainlines and get ready to cut!

Next:  Cutting and preparing the pieces.  Folding the origami flower. 


Friday, January 8, 2010

Shopper's Vest

Saf-T-Pockets has a vest pattern made for travelers and shoppers.  My mother (travel agent/tour escort), has wanted one for years.  This past Christmas, I dug through the stash of fabrics she's been bringing back from Japan for me to work with and constructed this.  There are pieces of kasuri, yukata fabric, and cotton remnants.  The body is made with silk noil and the inner lining is cotton poplin.  I cut the medium, tapering it to large. 


It's shapeless and bulky, especially when the pockets are filled, but it serves the purpose it was made for.  I would like to say it's perfect, but the shoulder seams are extremely long.  I should've shortened it by about 1" in order for it to fit her narrow shoulders.  But she's very happy with the space around the bottom and the many pockets on the inside.
 
Here's a picture of a detail I place on the back. 


And a view of the inner pockets on the left side.  I made the eye glasses pocket horizontal, with it half sewn across the top.  You can see my glasses peeking out.   The right side is similar, except there is a pen pocket and no chest pocket.  She requested separate pockets to fit her travel wallet, passport, eye glasses on one side, credit cards, camera, and other "stuff" on the other.  It also has inseam pockets on both sides.


The pattern also includes a large pocket in the back, and pockets under each arm.  I made the underarm pockets wider, but did not put in the back pocket.  The pockets are simple patch pockets, easy to adjust and sew on.  

I think I'd rather carry a bag than wear a vest as bulky as this... but I'm sure it works for her.  She's been traveling for many years and knows what she wants! 


Monday, February 2, 2009

2008 Handmade Christmas gifts

This fabric covered box is made with a simple shoebox, some spray adhesive, and some leftover fabrics in my stash. I put in a few hair clips, a styling brush and some hair bands and gifted it to my 9 year old niece. My sister says she uses the box to carry around all kinds of other stuff, but her hair goodies are all over the bathroom. Oh well... so much for helping her get her hair things organized. I will post a How To when I make the next box. I think I will make a few to organize my own things...


Inspiration for the next gift came from a well loved toy (BunnyBuns) that my 13 year old daughter is still holding on to. This lovey was adopted from an older sister and has even been traveling to Japan.

Here's the lovey made for my niece (14 months). I hope she will love it as much as BunnyBuns. The pattern is very old and no longer available but in case you'd like to search for it on ebay, it's McCall's Craft pattern 3760. I used it many years ago in an attempt to replace old BunnyBuns. Of course, that bunny just couldn't take old BB's place and has since been donated to Goodwill.

I also made a binder cover using Pokemon fabric for my 9 year old nephew and filled it with those plastic collector card holders, but I don't have a picture. I used the same basic instructions for making a journal cover. You can find them here: Instructions for making Journal Covers
I also gave a few Journals away as gifts, as well as car seat organizers to my sibs. They are finding them very useful. And you can see them in my AirMama makeover post.

So since this year's gifts were a success, my family will be receiving more handmade gifts in 2009. And this time I will start earlier. I already have some ideas.

Traveling vest for mom
Backsaver Handbag (with organizing pockets) for my sister
Quilt for my daughter (she moved into a new apartment this year... I miss her)
Quilt with thinsulate batting for my son (he will be moving to Minnesota in a few weeks and I know I'll miss him too)

And of course, I still have to think of gifts for all the other kids in my family.... like DH.